What is Protractor?
According to the official protractor website, “Protractor is an end-to-end test framework for Angular and AngularJS applications. Protractor runs tests against your application running in a real browser, interacting with it as a user would.”
Some of the nice features of protractor are
- Protractor is built on top of webdriverjs framework which uses native events and browser-specific drivers to interact with your application as a user would.
- Protractor supports Angular-specific locator strategies, which allows you to test Angular-specific elements without any setup effort on your part.
- You no longer need to add waits and sleeps to your test. Protractor can automatically execute the next step in your test the moment the webpage finishes pending tasks, so you don’t have to worry about waiting for your test and webpage to sync.
How Protractor Works?
- Jasmine/Mocha/Cucumber helps to create the test.
- Protractor helps to run the test.
- Selenium Server helps to manage browsers.
- Selenium WebDriver helps to invoke browsers APIs
Prerequisites
- nodejs - As protractor is a nodejs application
- JDK - To run the standalone selenium Server
Setup
Use npm to install protractor globallynpm install -g protractor
The above command will install both protractor and webdriver-manager. webdriver-manager is used to run selenium standalone server.
Next update the webdriver binaries withwebdriver-manager update
You can start up a selenium server by runningwebdriver-manager start
This will start the server at http://localhost:4444/wd/hubProtractor configuration
Before we start writing our tests, first we need to configure protractor
1 | // protractor.conf.js |
Jasmine overview
A birds-eye overview on Jasmine
1 | // Represents test suite |
Lets write our first test
By default protractor is configured to use Jasmine for writing the tests. However you can use mocha or cucumber as well.
In this tutorial we are going to use Jasmine for writing our tests. Lets write the below test in a example.spec.js file to check if our protractor configuration Works.
1 | // example.spec.js |
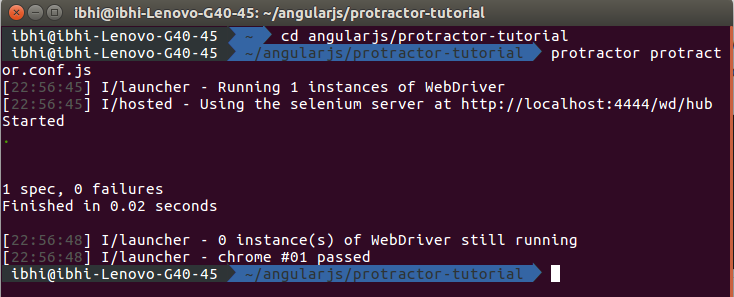
Now run protractor protractor.conf.js in command line in the working directory and you can see the test gets executed and chrome opens for a moment and closes immediately and you can see the result similar to below in your terminal.
Interacting with elements
Now let’s modify the test to interact with elements on the page. Change example.spec.js to the following:
1 | describe('Protractor Demo App', function() { |
For now just skip the browser.get() method and lets focus on element and by methods provided by protractor. element method is used to find HTML elements on the page and it returns ElementFinder object which has methods like getText, sendKeys and click etc., to interact with the element. The by object is used to create locators.
In the above example
by.model('first')to find the element withng-model="first". If you inspect the Calculator page source, you will see this is.by.id('gobutton')to find the element with the given id. This finds.by.binding('latest')to find the element bound to the variable latest. This finds the span containing
Stay tuned for Part 2!!